Here is a great planner that somehow I have not reviewed before! The August to August Calendar Organizer is now in its 30th year of production and is going strong!
The August to August Calendar Organizer is a weekly + monthly planner that allows you to plan through the entire school year and summer, into the beginning of the following school year. It is designed for students, teachers, parents, and anyone who runs on the school year.
The planners are made in the USA with 100% post-consumer recycled paper. The planner measures 5 3/4 by 8 1/2 inches and is lightweight to go easily with you everywhere in your bag, so you can plan on the go.
It's hard to find photos online of all the great features of this planner, so I will walk you through the book and show you them all!
Photos are my own, published with permission from Mixed Role Productions.
I'm not normally an orange person but this Pumpkin color spoke to me! Part of the fun every year is finding out the new cover colors, which vary each year. In addition to Pumpkin, the other colors available this year are Ocean blue, Crimson red, Jade green, and Licorice black.
The cover is laminated for durability and so you can wipe it clean. The corners are rounded so it goes in your bag easily, and the metal coil binding is very sturdy.
The first page has a place to write your contact information just in case.
Next there is an 18 month overview with reference calendars, and spaces to plan or track whatever you need for the whole 18 months.
Next are July and August monthly calendars, oriented so you need to turn the book to write in the day spaces. This orientation gives you more writing space in the days.
For every month there are pages for notes and for keeping track of your finances.
The weekly pages have big day spaces with nothing extraneous to take up valuable page space. The days are timed to the hour to help you plan your schedule. There's plenty of space to write your schedule at the left of the day space and your to do list at the right. US holidays are printed in the day spaces.
The unique lettering throughout the planner is hand-lettered, as described in this interview. It's labor-intensive, but customers enjoy the unique look so much they are dedicated to continue it!
After August's weekly pages are the monthly pages for September: Special occasions and events, the monthly calendar for September:
...a Notes page and your Finances for September:
Then the weeks resume. Weeks are not broken! Yay! (I can't stand it when weeks are broken by the month pages. I need to see my entire week on the page spread!)
The pattern of monthly pages embedded in the weekly pages repeats all the way through the end of August. After that there are monthly calendars for Sept-Dec, so you can plan all the way through the end of the year.
After that there are reference calendars for the following 18 months, and a page for notes:
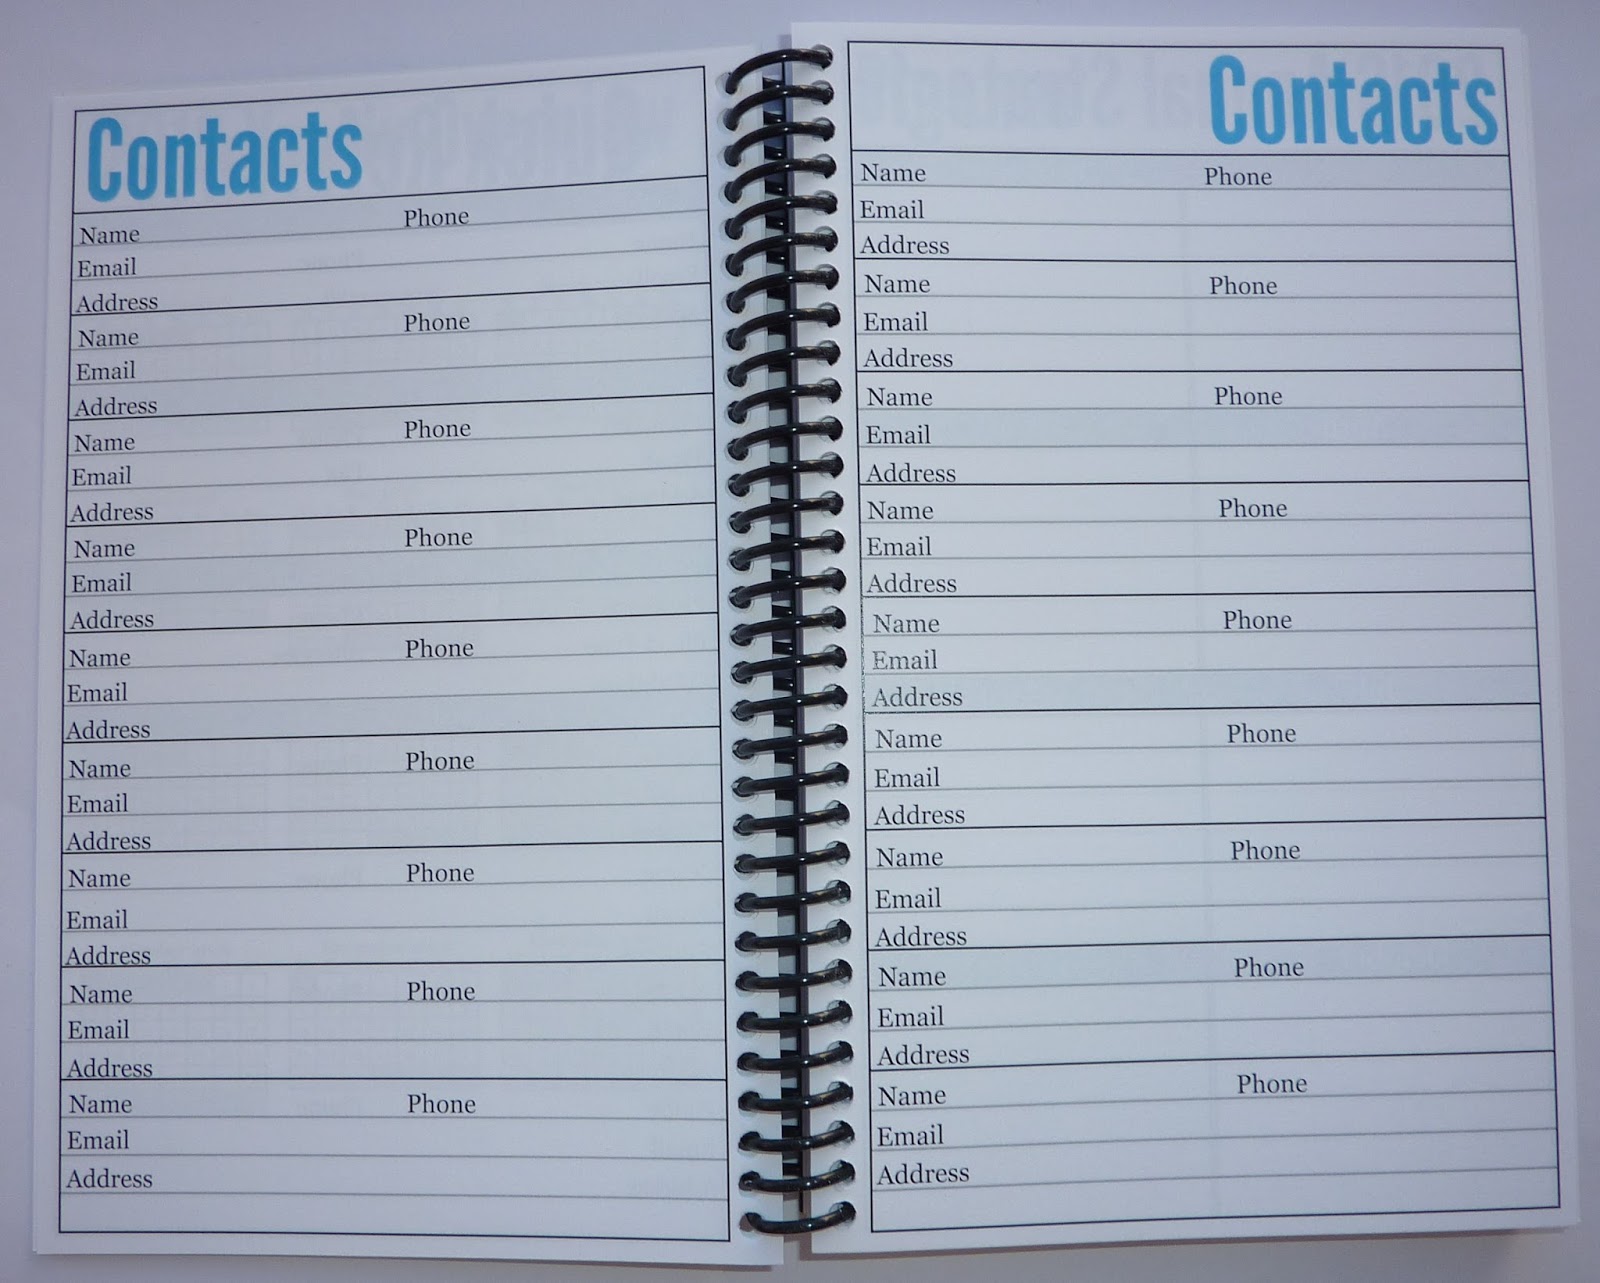
There is a very handy graph page with 35 squares down and 21 squares across. Then there are several pages for contacts.
And there are several notes pages.
At the back of the book is a double-sided pocket, and a clear plastic page marker.
Below you can see how to use the page marker. You can use it at the top or bottom of the pages. For some reason I turn my pages from the bottom.
The August to August Calendar Organizer is available from Mixed Role Production's website. They have excellent customer service and I highly recommend them!
They also make a January-start version of this planner with all the same features. It is due out in early September and will be available on their ordering page. Warning: they sell out quickly!
Mixed Role Productions ships all over the world! You can contact them to ask about international shipping rates.
You can find Mixed Role Productions at www.mixedroleproductions.com and be sure to follow them on Facebook too!
I purchased this planner with my own money. I am not affiliated with Mixed Role Productions and I did not receive any compensation for this review. I am just a satisfied customer!
Saturday, August 6, 2016
Monday, July 18, 2016
WeekDate 2016-2017 Academic year planner
Anyone who has been reading my blog over the years knows I have a special love for WeekDate planners. You can see all my posts on WeekDate planners here, scroll down to read them all.
A few years ago, WeekDate came out with an academic year version of their genius Only Write It Once system. The WeekDate planners have an amazing way to write all your weekly recurring events only once, and see them all the time alongside your daily specifics. More on that in a sec. Let me walk you through the book.
The WeekDate Academic year planners measure 6 3/4 by 8 3/4 inches, and are super slim and light so it's easy to carry in your bag. The outside cover is chipboard, which is sturdy but lightweight and gives a firm writing surface even when you are writing on the go.
Inside the chipboard cover is a colorful cover. The inside surface of this cover is where the magic happens. More on that in a mo. This is the Got It design. There are 6 different cover designs to choose from, you can see them all here.
When you open the planner, there is a page for your Personal Info:
Next there is a page with a short explanation of how to use the WeekDate planner, and their Time Tracker with fill-in bubbles to give you an easy visual of where you are in the year, or a countdown to a major event.
Here is the weekly spread. The days are timed columns. At the right is a column for that week's tasks and reminders. At the far right is a flap that you can fold in to mark your current week, and on the lined side write reminders, goals, use as a dashboard for sticky notes, etc.
Below the weekly pages is the inside of the cover I was telling you about before. This area is always visible, even when you turn the weekly pages. This is where you write weekly recurring events: class schedules, activities, meetings, which day to put out the trash, etc. This allows you to see your weekly schedule all the time, so when you turn the pages to schedule something in the future you can see what you already have scheduled and what time you have free.
Every day you look down the column to see that day's specifics and recurring events, so you always know what's going on every day. Note: use pencil on the recurring events spaces! That way you can change it seasonally or whenever your recurring events change.
Embedded in the weeks are monthly calendars with notes pages to write events, goals, notes, etc.
At the back of the planner are annual overview calendars for 2016 and 2017.
Below is another view of the flap that marks your current week. The back side is lined, this side has a reference calendar for the academic year 2016-2017.
This planner allows you to write your recurring events only once, and see them every week. This helps you plan your schedule faster and makes sure nothing slips through the cracks.
I don't have a photo, but you can also take the pages off the spiral and punch them to fit into your A5 size Filofax or Classic size Franklin Covey binder.
These planners are great for people with ADD, working parents, working students, or anyone who is juggling multiple roles. It keeps everything visible all the time so you can easily see what you have going on.
You can see the WeekDate Academic year planners here, and all the WeekDate products here.
Many thanks to WeekDate for sending me this planner as a sample to review!
A few years ago, WeekDate came out with an academic year version of their genius Only Write It Once system. The WeekDate planners have an amazing way to write all your weekly recurring events only once, and see them all the time alongside your daily specifics. More on that in a sec. Let me walk you through the book.
The WeekDate Academic year planners measure 6 3/4 by 8 3/4 inches, and are super slim and light so it's easy to carry in your bag. The outside cover is chipboard, which is sturdy but lightweight and gives a firm writing surface even when you are writing on the go.
Inside the chipboard cover is a colorful cover. The inside surface of this cover is where the magic happens. More on that in a mo. This is the Got It design. There are 6 different cover designs to choose from, you can see them all here.
When you open the planner, there is a page for your Personal Info:
Next there is a page with a short explanation of how to use the WeekDate planner, and their Time Tracker with fill-in bubbles to give you an easy visual of where you are in the year, or a countdown to a major event.
Here is the weekly spread. The days are timed columns. At the right is a column for that week's tasks and reminders. At the far right is a flap that you can fold in to mark your current week, and on the lined side write reminders, goals, use as a dashboard for sticky notes, etc.
Below the weekly pages is the inside of the cover I was telling you about before. This area is always visible, even when you turn the weekly pages. This is where you write weekly recurring events: class schedules, activities, meetings, which day to put out the trash, etc. This allows you to see your weekly schedule all the time, so when you turn the pages to schedule something in the future you can see what you already have scheduled and what time you have free.
Every day you look down the column to see that day's specifics and recurring events, so you always know what's going on every day. Note: use pencil on the recurring events spaces! That way you can change it seasonally or whenever your recurring events change.
Embedded in the weeks are monthly calendars with notes pages to write events, goals, notes, etc.
At the back of the planner are annual overview calendars for 2016 and 2017.
Below is another view of the flap that marks your current week. The back side is lined, this side has a reference calendar for the academic year 2016-2017.
This planner allows you to write your recurring events only once, and see them every week. This helps you plan your schedule faster and makes sure nothing slips through the cracks.
I don't have a photo, but you can also take the pages off the spiral and punch them to fit into your A5 size Filofax or Classic size Franklin Covey binder.
These planners are great for people with ADD, working parents, working students, or anyone who is juggling multiple roles. It keeps everything visible all the time so you can easily see what you have going on.
You can see the WeekDate Academic year planners here, and all the WeekDate products here.
Many thanks to WeekDate for sending me this planner as a sample to review!
Labels:
academic year,
WeekDate
Monday, May 23, 2016
TOAD (Today Or Any Day) Customized Planner/ Diary
I'm not posting very often here on Plannerisms these days, because I post four times a week over on Quo Vadis blog so most of my Planner Talk goes over there. But every now and then I discover a new planner that I feel compelled to write about. This is one such planner!
Disclaimer: I am not affiliated with TOAD in any way, and I paid for this diary myself. I do not receive any commissions and I do not represent the company in any way. I am merely a happy customer and wanted to share my experience.
TOAD (Today Or Any Day) www.toaddiaries.co.uk is a diary (planner) website in the UK where you design and customize your diary.
You choose everything about it: which weekly or daily layout you want, with timed appointments (and whether you want them to 15, 30 or 60 minutes), or with no appointments. You can choose a week + notes layout, a standard week across two pages, or a week per page. They also have family style formats that allow you to keep track of multiple people each week.
You choose which month to start your diary, and how many months you want in your book: 6, 12, 13, 16, 18, 21, 24 or 36. I chose 21 months for far-future planning!
There are loads of options, go check out their website to see what you can choose. I'll walk you through the planner I created and tell you about some of the options.
I chose an A5 size planner with wire-o binding, you can also choose book-bound. The wire-o bound planners come with a frosted plastic cover for durability.
They have tons of cover designs to choose from. Under the plastic cover you can see the cover I chose: Cover Theme Molten, Cover Design Halcyon. The Molten designs are images of ink and oil floating on water. I think they are all gorgeous, but my favorite color is purple so of course I had to go for this one! You can also personalize two lines on the front and back covers.
I'll walk you through my book. The inside of the front cover has a bunch of time-related quotes to inspire you. There is an If Found Return To page with the story of how Toad Diaries started.
There are several pages for personal information and important contacts:
There is a page with holidays and notable dates so you can write the ones that are relevant to you into your day spaces.

There are year overview pages for the previous, current and future year:
There are monthly planning pages that allow you to see six months per page:
I chose the week across two pages format, but you can also choose week per page, week + notes, timed with appointments, daily, etc.
I chose the diary + journal, which has 80 pages in the back of the book for notes! This is a great option for Bullet Journalers who want to be able to plan and bullet journal in the same book and are sick of drawing their own weekly pages.
The notes pages are NUMBERED and there is a Contents page for indexing!
At the back of the book there are 16 more pages for notes, which I'm guessing must be what comes in the normal (non-journal) diary. There is also a pocket, a card holder pocket, and a ribbon placemarker.
There are some other surprises in the book which I won't tell you about!
I don't know what the weight of the paper is, but it's superb: white and smooth, and on the back side I can hardly tell it's written on, even with my roller ball pens.
I ordered my book on a Wednesday morning and it was delivered the following Monday, which is super-fast delivery, especially for a custom book! I think TOAD ships internationally but I don't know their rates, you can contact them for more info on international shipping.
TOAD also makes dated inserts for Filofax and compatible ring-binder brands in A5, Personal and Pocket sizes. They also make A5 7-hole inserts for Collins ring binders but I don't know if these are compatible with Franklin Classic size. As with the bound books, you can choose the starting month and which layout/ format you want.
They also make notebooks, but not just regular notebooks. You can choose if you want lined pages, blank, dotted etc or mixed: lined and blank, dotted and lined, grid and blank, etc!
They are adding new features all the time, so check the TOAD diaries website often to see what's new!
You can also find them on Facebook, Twitter and Instagram.
Disclaimer: I am not affiliated with TOAD in any way, and I paid for this diary myself. I do not receive any commissions and I do not represent the company in any way. I am merely a happy customer and wanted to share my experience.
TOAD (Today Or Any Day) www.toaddiaries.co.uk is a diary (planner) website in the UK where you design and customize your diary.
You choose everything about it: which weekly or daily layout you want, with timed appointments (and whether you want them to 15, 30 or 60 minutes), or with no appointments. You can choose a week + notes layout, a standard week across two pages, or a week per page. They also have family style formats that allow you to keep track of multiple people each week.
You choose which month to start your diary, and how many months you want in your book: 6, 12, 13, 16, 18, 21, 24 or 36. I chose 21 months for far-future planning!
There are loads of options, go check out their website to see what you can choose. I'll walk you through the planner I created and tell you about some of the options.
I chose an A5 size planner with wire-o binding, you can also choose book-bound. The wire-o bound planners come with a frosted plastic cover for durability.
They have tons of cover designs to choose from. Under the plastic cover you can see the cover I chose: Cover Theme Molten, Cover Design Halcyon. The Molten designs are images of ink and oil floating on water. I think they are all gorgeous, but my favorite color is purple so of course I had to go for this one! You can also personalize two lines on the front and back covers.
I'll walk you through my book. The inside of the front cover has a bunch of time-related quotes to inspire you. There is an If Found Return To page with the story of how Toad Diaries started.
There are several pages for personal information and important contacts:
There is a page with holidays and notable dates so you can write the ones that are relevant to you into your day spaces.
There are year overview pages for the previous, current and future year:
There are monthly planning pages that allow you to see six months per page:
I chose the week across two pages format, but you can also choose week per page, week + notes, timed with appointments, daily, etc.
I chose the diary + journal, which has 80 pages in the back of the book for notes! This is a great option for Bullet Journalers who want to be able to plan and bullet journal in the same book and are sick of drawing their own weekly pages.
The notes pages are NUMBERED and there is a Contents page for indexing!
At the back of the book there are 16 more pages for notes, which I'm guessing must be what comes in the normal (non-journal) diary. There is also a pocket, a card holder pocket, and a ribbon placemarker.
There are some other surprises in the book which I won't tell you about!
I don't know what the weight of the paper is, but it's superb: white and smooth, and on the back side I can hardly tell it's written on, even with my roller ball pens.
I ordered my book on a Wednesday morning and it was delivered the following Monday, which is super-fast delivery, especially for a custom book! I think TOAD ships internationally but I don't know their rates, you can contact them for more info on international shipping.
TOAD also makes dated inserts for Filofax and compatible ring-binder brands in A5, Personal and Pocket sizes. They also make A5 7-hole inserts for Collins ring binders but I don't know if these are compatible with Franklin Classic size. As with the bound books, you can choose the starting month and which layout/ format you want.
They also make notebooks, but not just regular notebooks. You can choose if you want lined pages, blank, dotted etc or mixed: lined and blank, dotted and lined, grid and blank, etc!
They are adding new features all the time, so check the TOAD diaries website often to see what's new!
You can also find them on Facebook, Twitter and Instagram.
Labels:
custom,
customizable,
TOAD diary
Tuesday, March 22, 2016
2016 Essential Daily Planner by Productive Flourishing
Disclaimer: This planner was provided to me as a gift to thank me for years of support of Charlie Gilkey, his planners, and his website Productive Flourishing.
I've been a big fan of Charlie Gilkey's Productive Flourishing website (which has super-mega advice for entrepreneurs, freelancers, and creative people) and his excellent planners for a long time now, so I was very excited to get this new planner! Charlie's downloadable free planners are famous for helping folks manage their multiple projects. This new planner, the Essential Daily Planner, is a fantastic addition to the Productive Flourishing planners lineup.
The Essential Daily Planner takes a lot of the concepts from the Productive Flourishing planning methods and bakes them directly into the planner. These concepts are then printed and assembled into a planner that will be your personal assistant, life coach, and project manager all in one.
Charlie does a run-through video of the planner and explains the concepts behind it on this page. Take a look at that, then come back for more details on the planner itself.
The planner measures about 8 by 5 inches, so it's portable and easy to keep with you all day. The easier it is to access your planner, the more you will use it. (And you need to use your planner often for it to be effective.) The spiral binding allows the planner to lay flat on a surface or fold back on itself for compact use.
I'll walk you through the planner to show you all the features. The front cover is laminated for a sturdy, wipe-clean surface that can keep up with your life. The plastic coil is sturdy and flexible.
The first page has space to write your contact information just in case you lose your planner:
The first two-page spread (which I won't show you) gives you tips on how to use the planner, how to plan from the big picture down to daily details, and several online resources for more help and information on planning and productivity.
Next are some very handy annual overview and quick-reference pages, right at the front of your planner where you can find them easily:
Next is a two-page spread for more contacts. This is a great place to capture those frequently used contacts as a backup for your phone.
Now we start getting into the real meat of the planner. The Annual Strategic Planner gets you to think about what you want to accomplish during your entire year. It gives you spaces to break down goals and steps by month, and lots of space for notes.
Next is the Quarterly Planner, where you take those monthly goals from your Annual Strategic Planner and work through the details of what you want to accomplish each month. These pages give you plenty of room to brainstorm your Objectives, Milestones and Benchmarks for each month plus more space for notes.
After the Quarterly Planner comes a monthly overview for January. Right at the top of the page is a space to write your Monthly Objectives, so you can keep them visible all month long:
After the month overview come the weekly pages for January. On every weekly spread there is a nice big space for your Weekly Objectives. These will flow from your Monthly Objectives, and will be those actionable tasks that will get you to your goals.
At the end of that month's weekly pages, there is a page for Individual Project Planners, and three pages for notes. The notes pages are a great place to write your Mid-Month and Monthly Reviews.
These pages will help keep you on track with your projects for the month, and make it easy to find the related notes for each month.
Next is the following month's spread, with a new motivational quote every month:
Then there are the weekly pages for that month, again followed by a page for Individual Project Planners and three pages for Notes each month.
At the end of the three-month quarter you get the Quarterly Planner for the next three months. This prompts you to re-evaluate your goals from your Annual Strategic Planner, figure out what needs to continue from your previous quarter, and which priorities have changed. Having the Quarterly Planners embedded chronologically in the planner ensures you won't forget when it's time to plan and evaluate each quarter.
The pattern continues all year: Quarterly Planner, month overviews with their associated weeks, Individual Project Planners and pages for Notes.
At the end of the planner there are eight more pages of Individual Project Planners, and a whole bunch more pages for Notes. The result is a planner that will keep you on time and on track with all your appointments, projects and goals all year.
This planner works well alongside the Free Planners and Productivity Worksheets. For example you can plan your days in detail with the Daily Action Planner, write all your tasks on the Action Item Catcher, and plan your blog posts for the month with the Blog Post Planner and Calendar (which are excellent for helping you create valuable content on your blog). You can download these planners for free each month, or if you don't want to wait for them to come out each month you can buy the entire year's package to download as the Premium Planners Set.
Back in February 2010, Charlie Gilkey himself very graciously did an interview with me here on Plannerisms. It's a great insight into the thought process behind making his planners, and he has some excellent advice there for using planners in a way that fits your needs.
Huge thanks to Charlie and his team for sending me this planner! Keep doing what you're doing you guys, you help and inspire a lot of people!!
I've been a big fan of Charlie Gilkey's Productive Flourishing website (which has super-mega advice for entrepreneurs, freelancers, and creative people) and his excellent planners for a long time now, so I was very excited to get this new planner! Charlie's downloadable free planners are famous for helping folks manage their multiple projects. This new planner, the Essential Daily Planner, is a fantastic addition to the Productive Flourishing planners lineup.
The Essential Daily Planner takes a lot of the concepts from the Productive Flourishing planning methods and bakes them directly into the planner. These concepts are then printed and assembled into a planner that will be your personal assistant, life coach, and project manager all in one.
Charlie does a run-through video of the planner and explains the concepts behind it on this page. Take a look at that, then come back for more details on the planner itself.
The planner measures about 8 by 5 inches, so it's portable and easy to keep with you all day. The easier it is to access your planner, the more you will use it. (And you need to use your planner often for it to be effective.) The spiral binding allows the planner to lay flat on a surface or fold back on itself for compact use.
I'll walk you through the planner to show you all the features. The front cover is laminated for a sturdy, wipe-clean surface that can keep up with your life. The plastic coil is sturdy and flexible.
The first page has space to write your contact information just in case you lose your planner:
The first two-page spread (which I won't show you) gives you tips on how to use the planner, how to plan from the big picture down to daily details, and several online resources for more help and information on planning and productivity.
Next are some very handy annual overview and quick-reference pages, right at the front of your planner where you can find them easily:
Next is a two-page spread for more contacts. This is a great place to capture those frequently used contacts as a backup for your phone.
Now we start getting into the real meat of the planner. The Annual Strategic Planner gets you to think about what you want to accomplish during your entire year. It gives you spaces to break down goals and steps by month, and lots of space for notes.
Next is the Quarterly Planner, where you take those monthly goals from your Annual Strategic Planner and work through the details of what you want to accomplish each month. These pages give you plenty of room to brainstorm your Objectives, Milestones and Benchmarks for each month plus more space for notes.
After the Quarterly Planner comes a monthly overview for January. Right at the top of the page is a space to write your Monthly Objectives, so you can keep them visible all month long:
After the month overview come the weekly pages for January. On every weekly spread there is a nice big space for your Weekly Objectives. These will flow from your Monthly Objectives, and will be those actionable tasks that will get you to your goals.
At the end of that month's weekly pages, there is a page for Individual Project Planners, and three pages for notes. The notes pages are a great place to write your Mid-Month and Monthly Reviews.
These pages will help keep you on track with your projects for the month, and make it easy to find the related notes for each month.
Next is the following month's spread, with a new motivational quote every month:
Then there are the weekly pages for that month, again followed by a page for Individual Project Planners and three pages for Notes each month.
At the end of the three-month quarter you get the Quarterly Planner for the next three months. This prompts you to re-evaluate your goals from your Annual Strategic Planner, figure out what needs to continue from your previous quarter, and which priorities have changed. Having the Quarterly Planners embedded chronologically in the planner ensures you won't forget when it's time to plan and evaluate each quarter.
The pattern continues all year: Quarterly Planner, month overviews with their associated weeks, Individual Project Planners and pages for Notes.
At the end of the planner there are eight more pages of Individual Project Planners, and a whole bunch more pages for Notes. The result is a planner that will keep you on time and on track with all your appointments, projects and goals all year.
This planner works well alongside the Free Planners and Productivity Worksheets. For example you can plan your days in detail with the Daily Action Planner, write all your tasks on the Action Item Catcher, and plan your blog posts for the month with the Blog Post Planner and Calendar (which are excellent for helping you create valuable content on your blog). You can download these planners for free each month, or if you don't want to wait for them to come out each month you can buy the entire year's package to download as the Premium Planners Set.
Back in February 2010, Charlie Gilkey himself very graciously did an interview with me here on Plannerisms. It's a great insight into the thought process behind making his planners, and he has some excellent advice there for using planners in a way that fits your needs.
Huge thanks to Charlie and his team for sending me this planner! Keep doing what you're doing you guys, you help and inspire a lot of people!!
Monday, February 1, 2016
One year later: How Helen is using her pocket Moleskine planner
Many thanks to Helen for this post updating us on how she has been using her pocket size Moleskine planner for more than a year now! You can see her first post here.
My Life in Pocket Update – The Pocket Moleskine After One Year’s Use
Thank you Laurie for hosting my post, it is lovely to be back on Plannerisms!
Some of you may recall my post on how I use my Pocket Moleskine for my main planner. I have now been using this system for a whole year and will be using the same system for 2016, with some tweaks. Firstly, I should say that this is the first time I have ever used a system for an entire year without wondering whether I could make it any better. As I say, I have tweaked it, but I let the tweaks come organically. All the photos are from a mocked up day so you can see what I do, as I can’t publish client details.
A quick recap on my set-up. I use a Moleskine Pocket Weekly with notes.
It is a shame that the cover is white, after a year’s use, it is looking a bit grubby now, but the book held up well and the binding is still robust.
I use it for:
1. Appointments
2. Blocking out time for clients
3. Tasks
4. Notes I need to keep for posterity / tracking
5. Important information
6. Important contacts
The Moleskine Pocket Weekly with Notes is set up with the dates on one side and a lined notes page on the other. I split this note page into seven sections based on the dates on the opposite side. This allows me to put date specific notes next to the correct date without cluttering up the date side, which I used for appointments. This layout really works for me, as at a glance I can see how busy my week is with meetings and appointments without cluttering it up with notes and reminders. You can see that I use a Bullet Journal approach to my notes. I won’t repeat all the details from my previous post as much of it is the same. Instead I’ll take you through the tweaks.
I realised I wasn’t using the Moleskine to its full potential. There are lots of information pages and so on that I don’t use, and I could use for a different purpose. The first of these was the yearly calendar. I wasn’t sure what to do with this for a while, as it is so small. Then it occurred to me to use it to highlight big events such as holidays. I underline them in green and then next to the end of the week row I add a number in brackets. That number references a list of notes which are written in the blank space under the calendar which details the event. Eg. Holiday, theatre trips etc. This gives me an excellent overview of the year and stops me from over committing.
The planner also has a double spread for travel planning which I didn’t use for quite a long time, and then I struck on the idea of listing the books I have read here. I read a lot, and I have run out of room, so I downloaded some lined pages from the Moleskine Template Website, and pasted one on the next page (the time zone map), which I don’t use.
The Flight Duration and Dialling Codes, which are two double spreads, I use as a dash board. I put sticky notes on these pages with information I will need temporarily. For example, train times to get to a client, film details, books I have heard about, telephone numbers noted down, and to-do lists. The information on the stickies are either transferred to a permanent home eg. address books, note book or discarded when no longer needed.
The main diary pages look like this.
You can see the right had side has appointments, and the left hand side has notes. A check box is a to-do which I need to keep a record of having completed. A “B” is a blog entry for the day, E is for exercise and a dot is a general note. Each day I note down things related to my work eg. how many hours I have booked for a particular client, items I need to keep a record of, for example, taxes paid. A new habit I have developed is if I have spare room, then I add in little bits of life such as the book I am reading, anything nice which happened that day etc. I also record any MS Symptoms I may have. I am not a natural at journaling, but the odd note here and there is quite nice to see. I don’t worry if a page isn’t full, if it is a quiet week and I have white space, I don’t mind. I see it as my planner reflecting the ebb and flow of my life.
The monthly overview pages I use to block time out for clients. I also have codes for bank holidays (BH) and other things so I can see where regular events occur in the month.
For 2016, I have moved the useful information pages from the back to the front onto international dialling code pages and stuck them in, which leaves me the four lined pages at the back for my “Books Read” list. Everything else will remain the same.
I did run a Hobonichi A6 in parallel just for curiosity, and I loved the paper, but I just didn’t need all the room. I have re-purposed it as a notebook.
The pocket size seems very small, but you can get a lot in it. For me I don’t want to carry lots of stuff, and I love that I can grab my Moleskine and know that I have everything I need in it when I am out and about. It tells me where I need to be, when I need to be there and what I need to do. As a planner, that’s all I can ask of it!
Does anyone else use this size as their main planner?
My Life in Pocket Update – The Pocket Moleskine After One Year’s Use
Thank you Laurie for hosting my post, it is lovely to be back on Plannerisms!
Some of you may recall my post on how I use my Pocket Moleskine for my main planner. I have now been using this system for a whole year and will be using the same system for 2016, with some tweaks. Firstly, I should say that this is the first time I have ever used a system for an entire year without wondering whether I could make it any better. As I say, I have tweaked it, but I let the tweaks come organically. All the photos are from a mocked up day so you can see what I do, as I can’t publish client details.
A quick recap on my set-up. I use a Moleskine Pocket Weekly with notes.
It is a shame that the cover is white, after a year’s use, it is looking a bit grubby now, but the book held up well and the binding is still robust.
I use it for:
1. Appointments
2. Blocking out time for clients
3. Tasks
4. Notes I need to keep for posterity / tracking
5. Important information
6. Important contacts
The Moleskine Pocket Weekly with Notes is set up with the dates on one side and a lined notes page on the other. I split this note page into seven sections based on the dates on the opposite side. This allows me to put date specific notes next to the correct date without cluttering up the date side, which I used for appointments. This layout really works for me, as at a glance I can see how busy my week is with meetings and appointments without cluttering it up with notes and reminders. You can see that I use a Bullet Journal approach to my notes. I won’t repeat all the details from my previous post as much of it is the same. Instead I’ll take you through the tweaks.
I realised I wasn’t using the Moleskine to its full potential. There are lots of information pages and so on that I don’t use, and I could use for a different purpose. The first of these was the yearly calendar. I wasn’t sure what to do with this for a while, as it is so small. Then it occurred to me to use it to highlight big events such as holidays. I underline them in green and then next to the end of the week row I add a number in brackets. That number references a list of notes which are written in the blank space under the calendar which details the event. Eg. Holiday, theatre trips etc. This gives me an excellent overview of the year and stops me from over committing.
The planner also has a double spread for travel planning which I didn’t use for quite a long time, and then I struck on the idea of listing the books I have read here. I read a lot, and I have run out of room, so I downloaded some lined pages from the Moleskine Template Website, and pasted one on the next page (the time zone map), which I don’t use.
The Flight Duration and Dialling Codes, which are two double spreads, I use as a dash board. I put sticky notes on these pages with information I will need temporarily. For example, train times to get to a client, film details, books I have heard about, telephone numbers noted down, and to-do lists. The information on the stickies are either transferred to a permanent home eg. address books, note book or discarded when no longer needed.
The main diary pages look like this.
You can see the right had side has appointments, and the left hand side has notes. A check box is a to-do which I need to keep a record of having completed. A “B” is a blog entry for the day, E is for exercise and a dot is a general note. Each day I note down things related to my work eg. how many hours I have booked for a particular client, items I need to keep a record of, for example, taxes paid. A new habit I have developed is if I have spare room, then I add in little bits of life such as the book I am reading, anything nice which happened that day etc. I also record any MS Symptoms I may have. I am not a natural at journaling, but the odd note here and there is quite nice to see. I don’t worry if a page isn’t full, if it is a quiet week and I have white space, I don’t mind. I see it as my planner reflecting the ebb and flow of my life.
The monthly overview pages I use to block time out for clients. I also have codes for bank holidays (BH) and other things so I can see where regular events occur in the month.
For 2016, I have moved the useful information pages from the back to the front onto international dialling code pages and stuck them in, which leaves me the four lined pages at the back for my “Books Read” list. Everything else will remain the same.
I did run a Hobonichi A6 in parallel just for curiosity, and I loved the paper, but I just didn’t need all the room. I have re-purposed it as a notebook.
The pocket size seems very small, but you can get a lot in it. For me I don’t want to carry lots of stuff, and I love that I can grab my Moleskine and know that I have everything I need in it when I am out and about. It tells me where I need to be, when I need to be there and what I need to do. As a planner, that’s all I can ask of it!
Does anyone else use this size as their main planner?
Labels:
Moleskine
Subscribe to:
Posts (Atom)